Just after the release of version 2 of the Foobar jQuery plugin, we have now released version 2 of the Foobar WordPress Notification Plugin. To say there are few new features would be an understatement! We listened to the community and added some awesome functionality, resulting in a notification bar plugin for WordPress that we feel has no equal!
New Features
Obviously the WordPress plugin inherits all the new features in the jQuery plugin, but there are also a ton more. Here is a list of the combined new features.
- Bars can now be on the bottom
- Added 2 more button themes
- You can show navigation buttons to skip between messages
- Conditional Logic. Show a bar only on the front page, or for a specific category, or on the 404 page etc.
- Decide how the JS is included in the page (Dynamic / inline / generated to disc)
- You can now completely close the bar, not just toggle it
- Better support for client side cookies
- Smart widths. You can now stretch the message area width to fill the page.
- Allow encoding of HTML within messages, so they work with caching plugins
- Custom CSS and JS which are applied to all foobars
- Additional custom CSS and JS metaboxes for each foobar
- Proper implementation for RTL text
- Choose which post types see the “Choose Foobar” metabox
- Choose to only allow administrators to manage your foobars
- Performance improvements
- Better customization
- Online version checker
Bottom Bars
One of the most requested features was to get foobar working on the bottom of the page. With the WordPress plugin, it is super simple to do this. When creating a foobar, for positioning, just select “Bottom”:

Message Navigation
We added navigation buttons when multiple messages are used. So now when you hover over the messages, some cute little arrows appear that you can use to navigate through all the messages, instead of waiting. Again, very easy to choose the navigation theme:
More Button Themes
We added 2 more button themes, giving you a total of 5 button themes to choose from now:
Conditional Logic
In previous versions, you have always been able to choose to display a specific foobar on a page or post, with the help of a “Foobar Options” metabox. Now, with conditional logic, you can place specific foobars on different types of pages using WordPress’ built-in Conditional Tags. Basically, this means you can put a foobar that only shows on your front page, or a foobar for a specific category or tag, or a foobar on your 404 page. There is no limit to what you can do with this! And when using a plugin like mobble (which adds mobile-specific conditional tags to WordPress) you can show a certain foobar when the visitor is browsing your site on a mobile device.
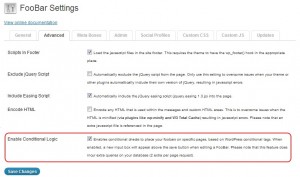
To setup conditional logic, enable it under the advanced tab in your foobar settings:

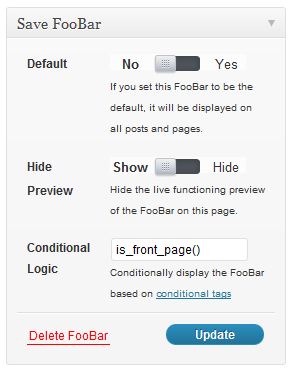
You will then see a new input box when editing a foobar. That is where you can enter your conditional tags:

Under the hood, this feature works the same way as the popular Widget Logic plugin, so if you have used that before then it should be a breeze. Please note that this not a beginners feature and only someone with some knowledge of WordPress and programming in PHP should use it.
Dynamic / Inline / Generated To Disk
We now give you the choice on how the JS and CSS is added to your page to get a foobar to show. By default, a php file is referenced and the jQuery code is built up on the fly. But we had some issues doing this on certain WordPress installs. Also, when embedding advanced shortcodes within your foobar (like a Gravity Form shotcode) it just didn’t work. So now you have to choice to keep it they way it has always been, or include the javascript code inline, or let the plugin generate JS and CSS files on the fly and those are referenced. Obviously, you get the best performance from referencing the files that are generated to disk, but you get more flexibility with inline code, so depending on your setup, use what you need:
Toggle Or Close
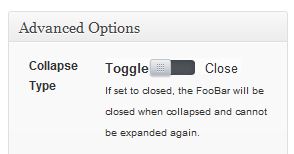
If you don’t want visitors to toggle your foobar between the expanded and collapsed states, but isntead, let them close it completely, then that’s easy too. Just set the collapse type in the advanced metabox when editing a foobar:

Better Cookie Support
When setting the collapse type to Close, you may want to use the new and improved client side cookie options. This is to enable the browser to “remember” if the user closed the foobar or not, so if they close it, it does not show again. You can now set a cookie name and a duration:

Administrators Only
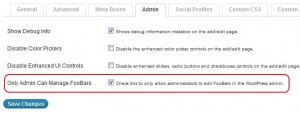
If you only want administrators to manage your foobars, then simply enable that on the foobar settings page:

Performance
A lot of things have been done to improve performance in V2. All of the images used for buttons and navigation are now using image sprites. As mentioned above, you choose how to include the JS and CSS files. Generating to disk giving you the best performance. You can also choose to include the JS files in your site’s footer, which is a best practice. And most of the advanced features are turned off by default, and you choose when to turn them on. Some of the features obviously add some overhead (conditional logic or encoded HTML) but it is really up to your website and your WordPress setup.

